How to: Electricity into Panels
This page will go through all the questions we had when we started: materials, supplies, techniques we have used at the their different stages.
Electrical Boxes
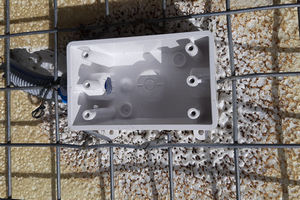
Electrical Box for light
After trying many electrical boxes, the old work models was the one working the best with the panels and the easiest to install. The mounting ears were attached in front of the grid.
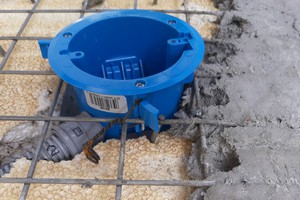
Electrical Box for Outdoor Plugs
This is a plastic waterproof box. With this technique, the conduit is attached to the grid to avoid moving during concrete spraying. We performed our technique by installing the next ones along the grid for a better stability.
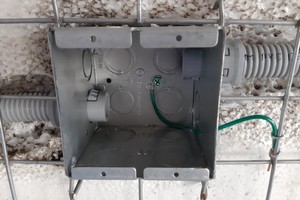
Electrical Box for Inside Plugs
For inside plugs, we have used deep metal masonry boxes. These boxes were perfect because they fit into 2 squares per gang and allow snap-on just behind the grid. They needed to be grounded with a pigtail.
The technique of installation of the electrical boxes varies a little bit depending on the type of box. But, they all go through the same process: shrinking the foam, minimum cutting of the grid.
The minimum cutting is important to stabilize the box and to avoid the extra work of installing 45 degres reinforcement grid for each opening.
The electrical boxes are installed around 1.5cm off grid to be flushed to the final concrete or surface.
Even if the foundation was grounded, the permit asked up to reground each metal box for safety reasons.
We have used a torch to shrink the foam and an air nipper to cut the metal grid.
Conduits Through the Panels
We have used ENT conduits and Snap-on connectors for an easy and quick work.
We have used a small garden lopper to cut the conduits. We have used a large flat screwdriver to push the conduit behind the grid and long-neck pliers with adjustable angles to push the connector into the plug behind the grids.
The torching method is important. It needs to be big enough to allow conduits to go through, but the smallest possible for preserving the insulation. At the beginning, we added fireplace spray foam to replace the foam on the exterior walls.
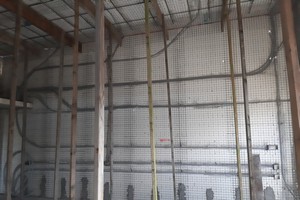
ENT conduits going through the panels from the plugs to the junction box.
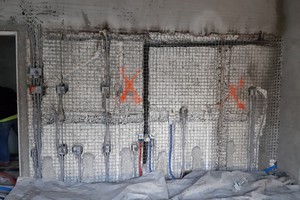
Walls panels with electricity and plumbing installation just before pouring concrete (Kitchen).
TIPS
Before pouring concrete, take precise pictures of all the walls. For reference, each square of the grid panel is 2x2in. Then, it just needs to count the squares to recover a box or conduit.
It is still good to take picture with measurement of the localisation of the boxes.
Also, before pouring tape all the electrical boxes and add a longer piece of cardboard in the center to easily find them after spraying.
Junction Boxes

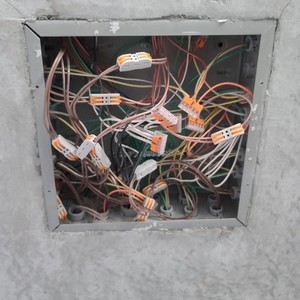
Junction Boxes allow to regroup type of wire/equipments before sending them to the electrical panel.
We have used Wago to connect the wires.
TIPS
In the opposite of wood houses, it is difficult to add invisible wires after concrete without breaking it.
Breaking concrete is not fun! It is preferable to take time to think about everything before pouring concrete.
In our case, we went slower on the rebuilding process, but we took time to walk around the house and see where we needed to add lights, plugs, switches and we adjusted it consequently.
We also have planned larger and/or extra boxes and conduits for feature improvments.
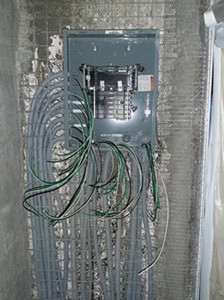
Main Panel and Subpanels
Main Panel
The main panel has the meter and is installed outside. It is connected to PG&E electricity and can send electricity to the main subpanel if needed.

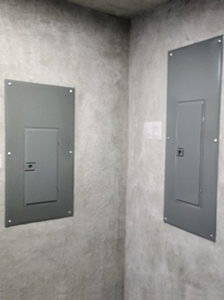
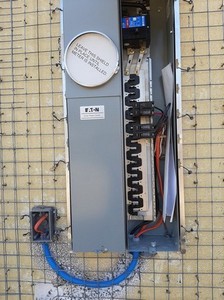
Main Subpanels Before and After Concrete
These are 2 subpanels. The largest subpanel receives electricity from PGE or from the inverter. It contains all the equipments that still need to be powered in case of electricity shortage. The smallest one is only powered if there is electricity from PG&E or the batteries.
JADU Subpanel
In order to discharge the main subpanels, there are 2 subpanels for the JADU and the kids area. The subpanel in the apartment will keep it mostly independant from the main house.
Solar System Installation
We wanted the house to be the most independant possible.
For water, there is the well.
JP built this solar system to continue our energy independance.
First, we made concrete channels on the roofs where the rails were attached to.
Then, we installed the rails and the solar panels attached to them.
Still in the idea to stay independant, JP has chosen SolArk. This inverter gave us the freedom that some manufacturers do not.
To comply with our system, all the house is 100% electric: induction cooktop, electric dryer, electric heating system...

Inverter
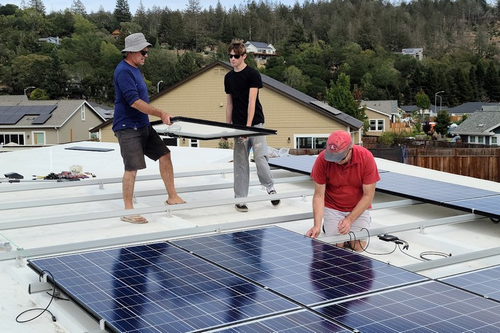
Solar Panels.
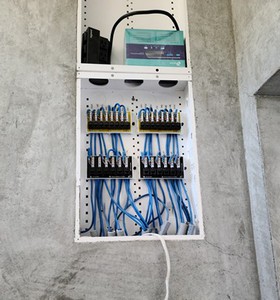
Internet and Communication
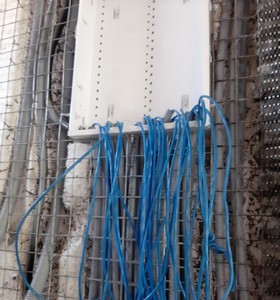
Because of the the thickness of the walls (about 10in), the quantity of rebars and mostly the metal grid of the RSG-3D panels, the house is like a Faraday cage. We knew Wifi will not work very well. So, we planned an alternative solution.
By security, each room has RJ45 plugs. The house has a central RJ45 control panel.
The Wifi inside the house is even worst than expected. We have installed 3 extra repeters to cover the entire house.